Category: Uncategorized

  • The Best Car Seat Travel Bags and Carts for Flying With Kids (From a Car-Free NYC Family)

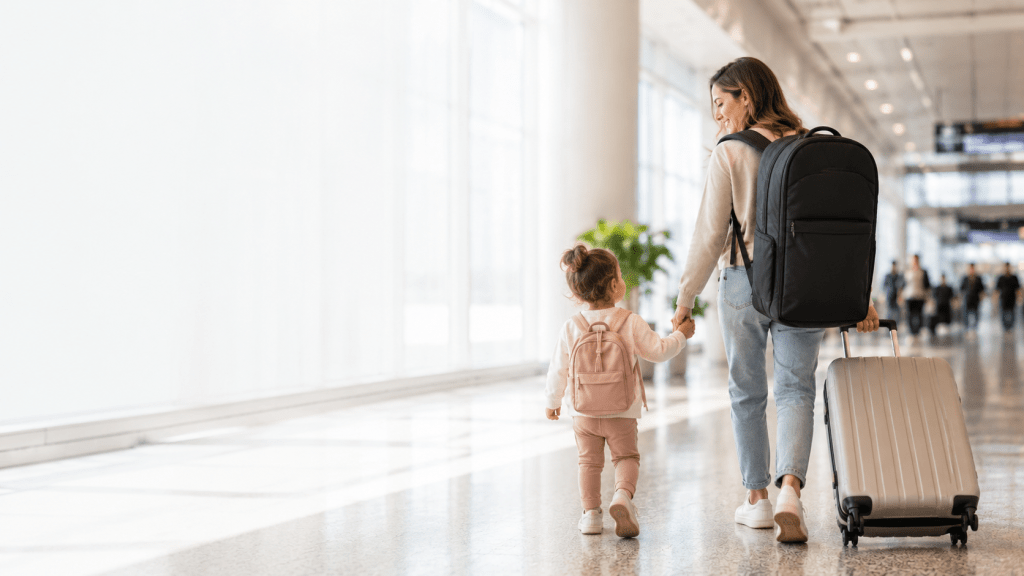
    If you are flying with a car seat, you already know the two annoying truths. It is bulky and heavy and awkward to carry, and once it leaves your hands at the gate or the check-in counter, it gets thrown around like everything else in the cargo hold. A cracked shell or a soaked, grimy seat is not how you want to start a trip.

    We live in New York City without a car, so our “car seat” is really a travel seat, and we have hauled it through more airports than I can count. Over the years we have tried a few different ways to protect it and move it without adding one more thing to carry while also wrangling a kid. Some held up. Some did not.

    This is the honest rundown of what actually works, sorted by the situation you are in. There is no single best pick here, because the right answer depends on which seat you own and whether you would rather carry it, wear it, or roll it.

    This post contains affiliate links. If you buy through them, we may earn a small commission at no extra cost to you.

    One habit we never skip: we put an AirTag in everything we check, the car seat included. Gear gets lost, and a tracker turns “where is our seat” panic into a quick glance at your phone. A four-pack of AirTags covers the seat, the stroller, and your checked bag with one to spare, and trust us, you will use all four. Two of the picks below have a built-in AirTag pocket. On the rest, an interior pocket or a piece of tape does the job.

    Quick answer

    Best for Doona families: Doona Padded Travel Bag

    We use a Doona, which made sense for us because we do not own a car and did not want a dedicated car seat sitting unused most of the year. The bag we reach for every trip is the Doona Padded Travel Bag, and it has earned its spot in our closet.

    What I like about it is the balance. The padding feels thick enough to actually protect the seat, but the whole thing stays light, around two and a half pounds, so I am not adding much weight to lug around. It is made from a water-repellent rip-stop fabric, it folds down small when we are not using it, and it is cut to fit the Doona exactly, so nothing shifts around inside.

    The feature that matters most to me is the backpack straps. When you are traveling with kids, straps are not a nice-to-have, they are the whole game. I cannot have one more thing in my hands while I am holding a ticket, a toddler, and a coffee I will probably never finish. Being able to wear the seat on my back and keep my hands free is the difference between a manageable airport and a meltdown.

    The real drawbacks. It only fits a Doona, so if you own any other seat this bag is not for you. And at around $125 it is easily the priciest pick on this list. You are paying for the custom fit and the brand, and whether that is worth it depends on how often you fly and how much you want to protect a seat that is not cheap to replace.

    Who it is for. Doona owners, especially car-free or city families who travel with the Doona as their only seat and want protection plus hands-free carrying.

    Best for big convertible seats and sneaking in extras: Steel Cable Handle Padded Bag

    Once our oldest grew out of the Doona, we switched to a big padded convertible-seat bag, the one sold as the Car Seat Travel Bag with Steel Cable Handle and Reflective Stripes. It runs about $34.99, and it has been a workhorse.

    The thing I appreciate most is how much it swallows. It is roomy enough to fit a range of car seat sizes, which means it also has space left over for the stuff you would otherwise be stuffing into a carry-on. We throw diapers in there too. (Do not tell the ticket agents.) There is a front pocket plus side mesh pockets, padded interior wings and a strap to hold the seat in place, a sturdy steel-cable top handle, reflective strips for low light, and yes, the backpack and waist straps that make it carryable without occupying your hands.

    One pro tip from actually living with this bag: do not buy the grey one. It ends up looking dirty fast, and by the third trip it reads more grimy than gear. If I were doing it again I would go black. Same bag, hides the wear far better.

    The real drawbacks. The grey shows every scuff, as noted. It is also a soft bag, so it shields against dirt and scrapes more than hard impacts, and like any large universal bag, some oversized or all-in-one seats may not fit, so measure your seat before you buy.

    Who it is for. Parents with a convertible or all-in-one seat who want a budget-friendly bag with real room to spare and hands-free carrying.

    Best overall if you do not own a Doona: J.L. Childress Deluxe Padded Backpack

    If you do not have a Doona and want one bag that handles almost any seat, the J.L. Childress Deluxe Padded Backpack is the one I would point most people to. It runs around $53.

    It has extra-thick padding and padded interior wings, harness-style backpack straps that adjust to your back and then detach and tuck away when you check it as luggage, and it fits almost all car seats, including infant seats with the base and booster seats. The feature that sets it apart is a built-in AirTag holder. If your seat is going in the hold, being able to see exactly where it is gives you one less thing to stress about at baggage claim.

    The real drawbacks. It is bulky and it has no wheels, so on long airport treks you are carrying or wearing the full weight. It also costs more than the generic bags that do the basic job, so you are paying for the padding, the brand, and the tracking. And you do need to remember to tuck the straps before checking it, since loose straps can snag in baggage systems.

    Who it is for. Anyone without a Doona who flies often, wants durable padding, and likes the peace of mind of tracking the seat.

    Best budget: J.L. Childress Gate Check Bag for Car Seats

    If you are gate checking and just want to keep the seat clean and a little protected without spending much, the J.L. Childress Gate Check Bag for Car Seats is the simple answer. It runs around $16.

    It fits almost all car seats, closes with a lockable drawstring, and stuffs down into its own attached pouch so it lives in your diaper bag until you need it. The newer version also has an AirTag holder, which is a nice touch at this price. The bright bag and ID box help airport staff get the right seat back to you at the gate.

    The real drawbacks. This is a lightweight cover, not armor. It shields against dirt and grime and casual handling, but it has minimal padding, so it is best for gate checking rather than sending the seat through full baggage handling. If you want impact protection, size up to one of the padded bags above.

    Who it is for. Gate-checkers who want cheap, packable, no-fuss protection and do not need cushioning.

    Best cart for rolling the seat: zhtangrui Car Seat Dolly for Airport

    Sometimes the problem is not protection, it is your back and your hands. My sister leaned on a folding car seat dolly like this one through the airport and loved how much it freed up her hands when she was managing a kid and a pile of bags at the same time. The zhtangrui Car Seat Dolly for Airport solves that specific problem.

    The idea is simple. You strap your car seat to a small folding cart and roll it through the terminal instead of carrying it, and when you board, the cart folds down small enough to stow in the overhead bin. It comes with ratchet straps to lock the seat in place, and it rolls smoothly across airport floors so you are not hauling dead weight on your shoulder.

    One important thing to get right: this is for moving the seat, not for wheeling your child. The manufacturer specifically says not to roll it with a child sitting in the seat, so think of it as a luggage cart for your car seat, with your little one walking or riding in a stroller or carrier alongside.

    The real drawbacks. It is built for lighter travel seats, not big 3-in-1 or all-in-one convertibles, so check your seat’s weight and size before counting on it. There is also a small learning curve with the straps, so practice strapping and releasing the seat at home before you are doing it curbside at 5 a.m. with a tired toddler. And because it is a cart and not a bag, it does not protect the seat from dirt or damage if you check it, so some families pair a dolly with one of the bags above.

    Who it is for. Parents with a lighter travel or infant seat who want to save their back and would rather roll the seat than wear it.

    So which one should you get?

    If you own a Doona, the Doona Padded Travel Bag is the easy call. If you have a big convertible seat and want room for extras on a budget, the steel-cable padded bag is the value pick. If you want one durable, trackable bag that fits almost anything, the J.L. Childress Deluxe is the safe overall choice. If you are gate checking on a budget, the J.L. Childress Gate Check bag does the basic job for around $16. And if carrying is the real problem, the dolly lets you roll the seat and keep your hands free.

    Whatever you pick, the straps matter more than you think. When your hands are full, being able to wear or roll the seat instead of carrying it is the thing that actually saves the day.

    Safe travels, and may your seat come off the carousel in one clean piece.

  • The 4 Best Travel Sound Machines for Babies (From a Parent Who Packs One Every Trip)

    Yogasleep Hushh portable white noise machine, our top travel pick
    The Yogasleep Hushh, the one machine that comes with us on every trip.

    Sleep is fragile enough at home. Take your baby to a hotel, a grandparent’s guest room, or an Airbnb with paper-thin walls, and the sleep routine you worked so hard to build can fall apart by night one.

    A portable sound machine is one of the few pieces of baby travel gear that earns its spot in the bag every single time. It recreates the one constant your baby knows from home, no matter how unfamiliar the room is. The hallway ice machine, the neighbor’s TV, the 6am garbage truck: all of it fades behind the sound your kid already associates with sleep.

    We’ve traveled with a sound machine on every trip since our son was born, so this list is built on real bag space and real hotel nights, backed up by current specs and what other parents report. If you’re building out your travel kit, our guide to toddler airplane travel essentials covers what else earns carry-on space. Here’s what actually works.

    This post contains affiliate links. If you buy through them, we may earn a small commission at no extra cost to you.

    Quick Answer: Our Picks

    Best Overall: Yogasleep Hushh

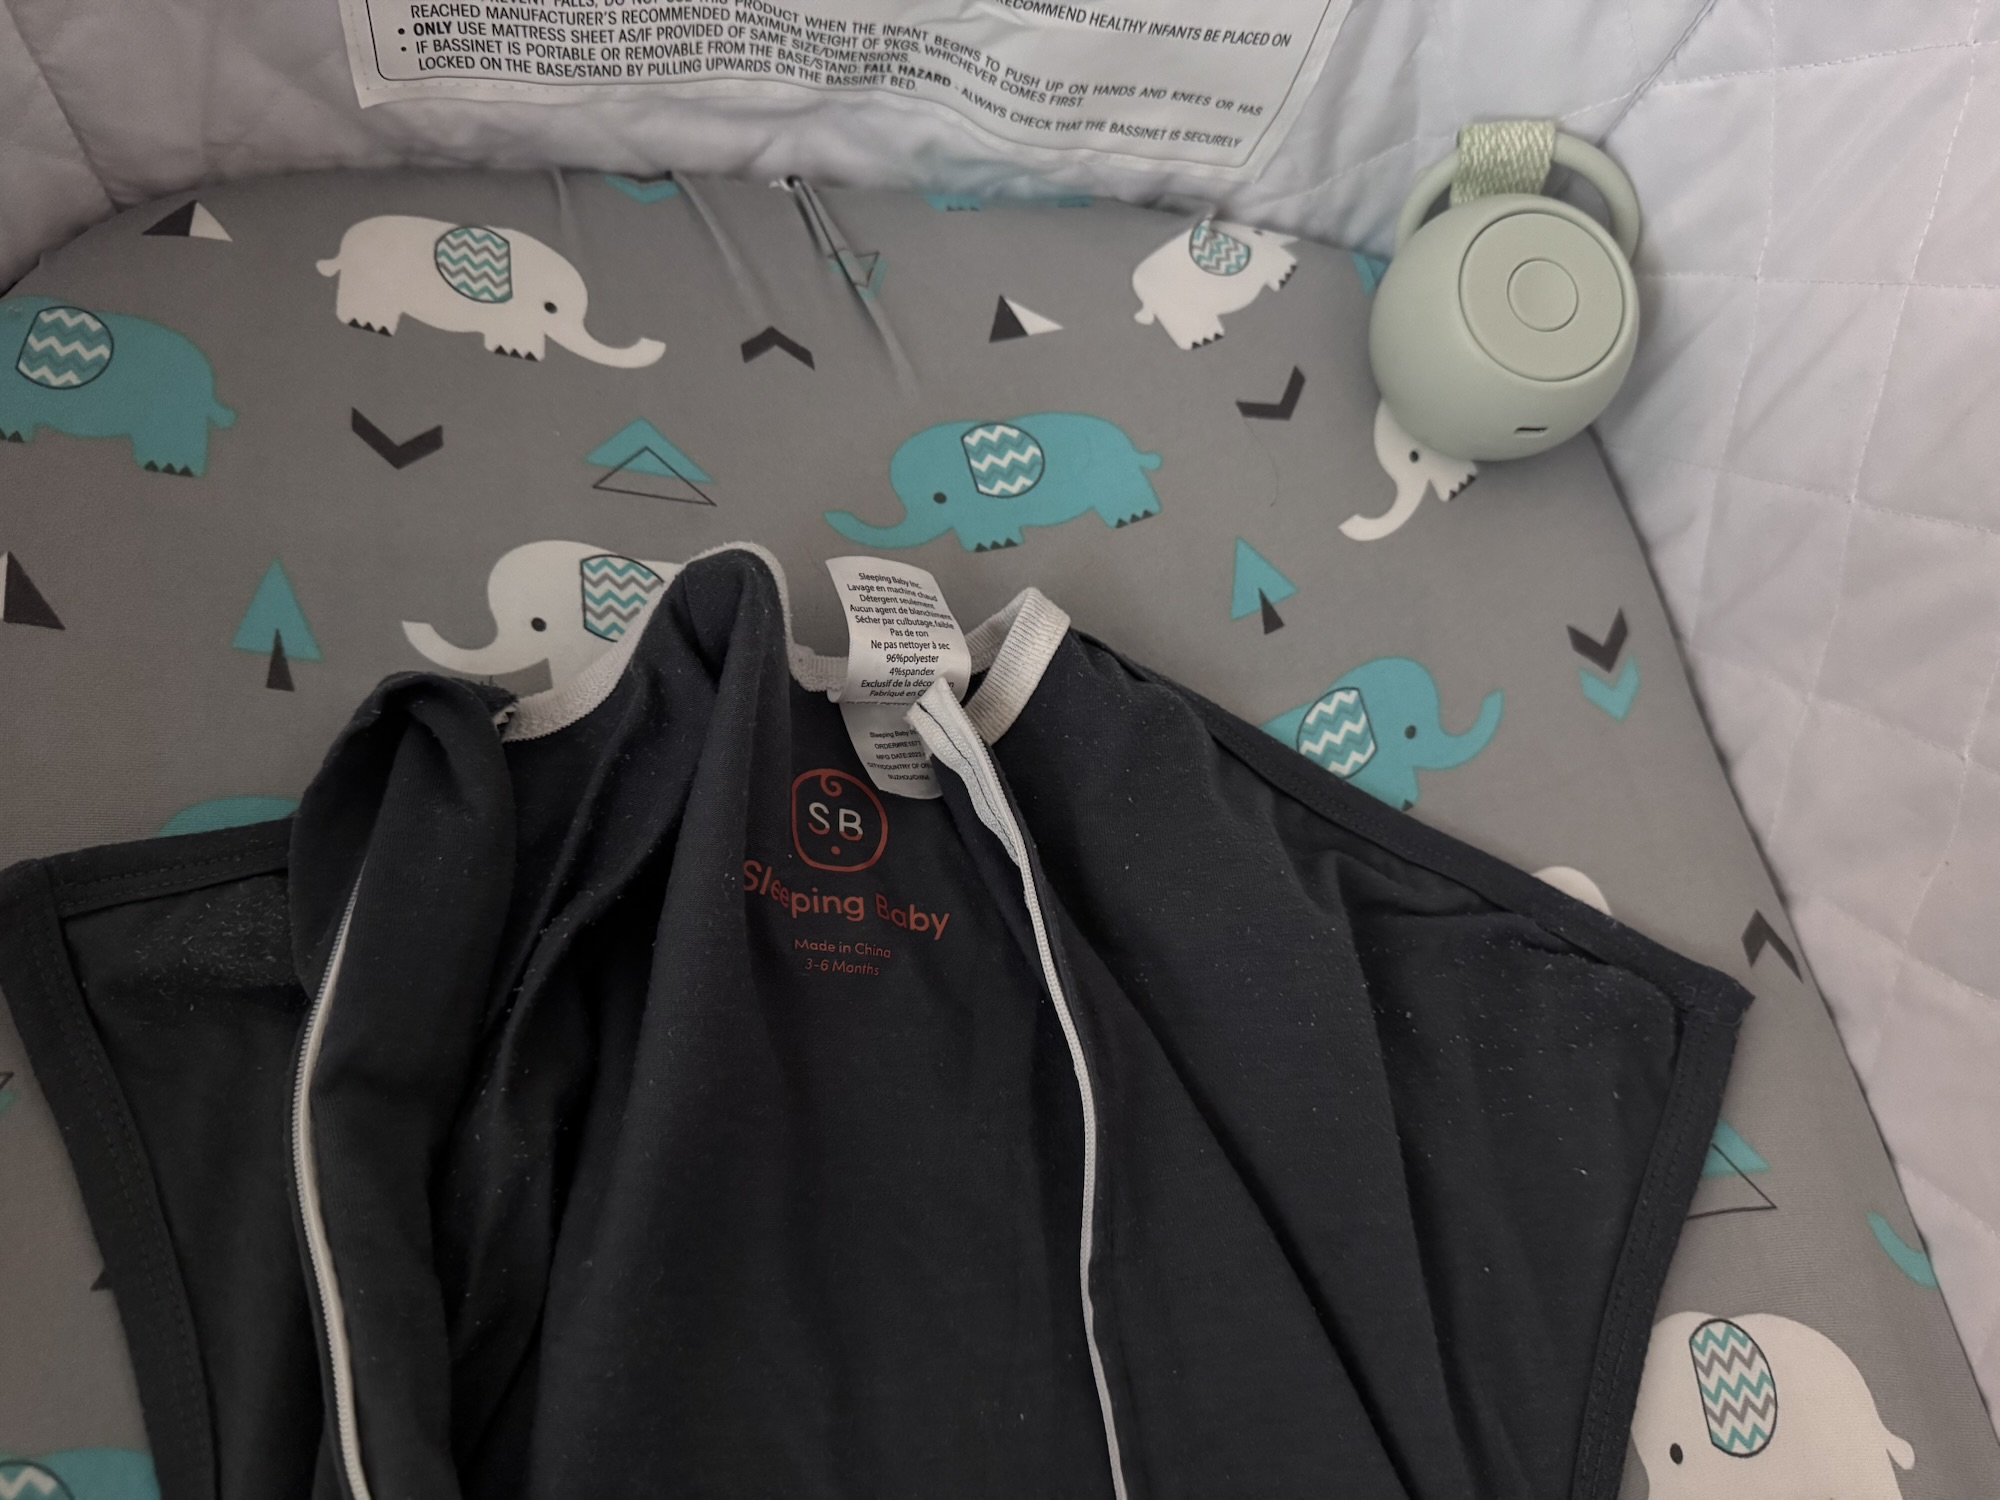
    The Hushh has gone with us on every single trip. It fits easily into whatever bag we’re carrying, and there’s something about those high contrast buttons that just makes it easier to control when you’re in the thick of it. At 11pm in a dark hotel room with an overtired baby, not having to squint at tiny icons or cycle through menus genuinely reduces stress. That’s worth more than any feature list.

    The Hushh is a palm-sized puck with three sounds: bright white noise, deep white noise, and gentle surf. It charges over USB, has a continuously adjustable volume dial rather than preset steps, and comes with a baby-safe clip that attaches to travel cribs, strollers, and bag handles. List price is $29.99 and it frequently dips a few dollars below that.

    Real drawbacks: three sounds is the whole menu, so if your baby is attached to a heartbeat sound or lullabies, this isn’t your machine. The buttons don’t lock, so it can get bumped on in a packed bag. And battery life depends heavily on volume. Yogasleep rates it at roughly 2 hours at full blast, while independent testers report around 10 hours at medium volume. In our experience we’ve never had to run any sound machine at full volume, so this has never actually been an issue for us, but it’s good to know. If you want it loud all night, plan to plug it in.

    Who it’s for: parents who want one simple, reliable machine that does white noise well and nothing else. If your baby sleeps to plain white noise, buy this and stop thinking about it.

    Best for Hatch Households: Hatch Rest Go

    Hatch Rest Go portable sound machine for baby travel

    We’re a Hatch family. There’s a Hatch Restore in our room, a Rest+ 2nd Gen in our toddler’s room, and a Rest Go clipped to the baby’s crib. With our older son, the Rest+ became the backbone of his bedtime routine: blue light to signal that the routine is starting soon, yellow for book time, then lights off with just the sound running to signal it’s time to get in bed. When a device anchors your kid’s sleep cues that deeply, you want those exact same sounds on the road.

    That’s the case for the Rest Go. It’s a baseball-sized portable machine with 10 sounds including white noise, hush, heartbeat, and ocean, and crucially, they’re the same sounds as the home Hatch machines. Your baby falls asleep in the hotel to the identical audio they hear every night in their crib. The battery is rated up to 15 hours and it keeps playing while charging, so an overnight stretch plugged into a power bank or wall is no problem.

    Real drawbacks: at around $39.99 it’s the priciest pick here, and you’re partly paying for the ecosystem. The single rear button is easy to press, so it has a habit of switching itself on inside a suitcase. And some owners report battery life closer to two nights of use before needing a few hours on the charger, which is shorter than the spec suggests if you run it long and loud.

    Who it’s for: families already running a Hatch at home. The sound continuity is the entire value proposition. If you don’t own a Hatch, the picks above and below do the travel job for less money.

    Best Budget: Frida Baby 2-in-1

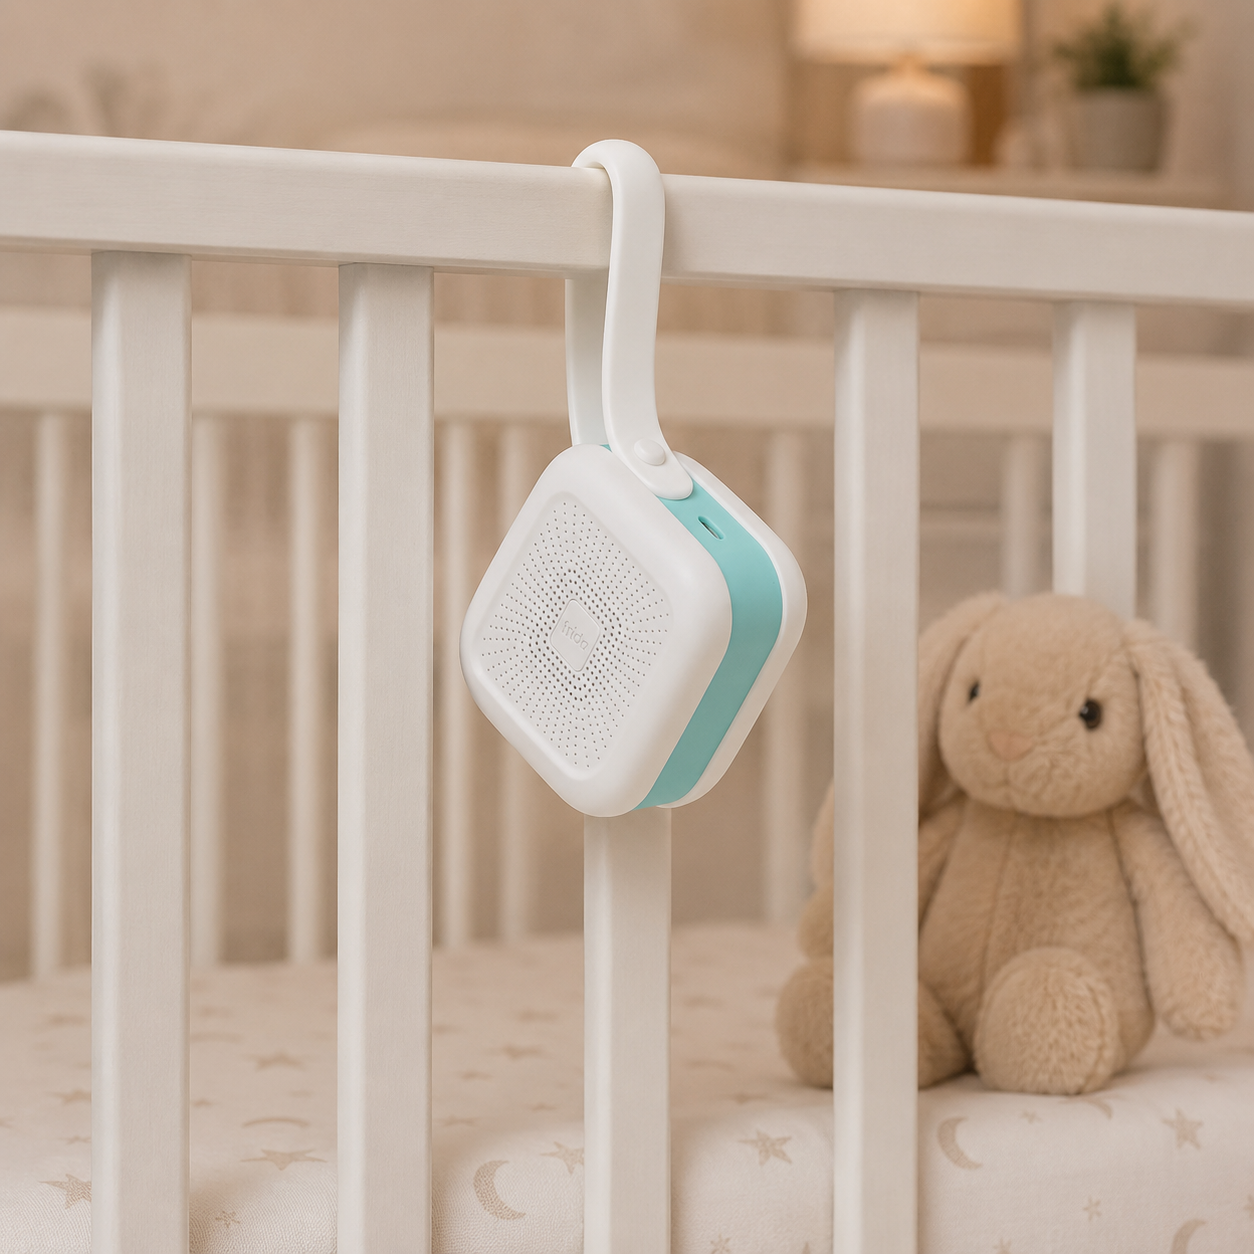
    Frida Baby 2-in-1 portable sound machine and nightlight

    At about $25, the Frida Baby 2-in-1 covers the two things you actually need in a strange room at 2am: sound and a little bit of light. It plays five sounds (shushing, heartbeat, waves, nature sounds, and pink noise) and adds three nightlight levels, which is the feature the Hushh skips. A soft glow for a night feed in an unfamiliar room, without flipping on a lamp and fully waking everyone, is quietly one of the most useful things on this list.

    It attaches with an adjustable strap rather than a clip, which wraps securely around stroller bars, car seat handles, and travel crib rails. The battery is rated up to 15 hours, it plays while charging over USB-C, and there’s an auto shut-off timer. Parents consistently report it surviving repeated drops, which matters once your baby is old enough to grab things and fling them.

    Real drawbacks: five sounds is a short menu, and there’s no child lock, so a curious toddler can change the settings mid-nap. The strap design also means it’s built to hang more than to stand, so on a flat nightstand it’s less tidy than the puck-shaped options.

    Who it’s for: parents who want the night feed light and solid basics at the lowest price here. Also a strong pick if most of your baby’s away-from-home sleep happens in a stroller or car seat.

    Best Feature Set: Momcozy Portable Sound Machine

    If your baby is picky about sound, or you simply don’t know yet what works, the Momcozy gives you the most options for the money. It packs 20 sounds spanning white, pink, and brown noise, fan sounds, nature sounds, and lullabies, plus an adjustable amber nightlight that’s gentle for night checks. It has the child lock the Frida lacks, an auto shut-off timer, and a clip for strollers and car seats. It charges over USB-C in about 2 hours and runs roughly 10 hours on a charge. It currently sells for around $28, down from a $39.99 list price.

    Real drawbacks: some of the sound loops are short, so tracks like the fire crackle repeat in a way that doesn’t sound natural. Whether that bothers you depends on the sound; the plain noise options don’t have this problem. One more practical note: Momcozy sells several portable models that look nearly identical, so double check you’re getting this clip-on version with the nightlight and not one of its siblings.

    Who it’s for: parents who want maximum sound variety and a child lock without going over $30. The best pick if you’re still figuring out what your baby responds to.

    How to Choose

    If you want simple and proven, get the Hushh. If you already own a Hatch, the Rest Go’s sound continuity is worth the premium. If budget leads, the Frida covers sound plus night feeds for the least money. If your baby is particular about sounds, the Momcozy’s 20 options give you the most room to experiment.

    One honest note that applies to all four: a sound machine helps your baby sleep in a new place, but it won’t fix an overtired baby, a 4-month sleep regression, or a hotel room that’s too bright at 7pm. It’s one tool in the routine, not the routine itself.

  • Best Blackout Solutions for Hotel Rooms With Babies and Toddlers

    Best Blackout Solutions for Hotel Rooms With Babies and Toddlers

    Affiliate disclosure: This post contains affiliate links. If you buy through these links, we may earn a small commission at no extra cost to you. We only recommend products we believe are worth your money.

    Travel sleep tends to fall apart fast, and one of the biggest reasons is light. Hotel rooms often look fine during the day, but at nap time or bedtime they can be far brighter than expected. Thin curtains, uncovered windows above the drape line, and light bleeding in from hallways can make it nearly impossible for a baby or toddler to settle.

    The good news is that you do not need a complicated setup to fix that. The right blackout solution can darken a room quickly and make it significantly easier for little ones to fall asleep and stay asleep when they do. You just need to know which option fits how you actually travel.

    These are the best blackout solutions for hotel rooms, especially if you want better naps, less early wake-up chaos, and a simpler bedtime setup away from home.

    Quick Answer: What Blackout Solution Is Actually Worth Packing?

    The Short List

    These are the options most likely to help without taking over your luggage. Keep reading for why each one matters.

    Why Hotel Room Light Matters More Than Parents Think

    Most parents know their child needs darkness to sleep well at home. What catches people off guard on trips is just how bad hotel room darkness can be. Even hotels with blackout curtains often have significant light gaps at the sides, tops, and bottoms of the window where light pours through. Add in a sunrise at 5:30am in a room facing east and an early wake-up becomes almost guaranteed.

    Nap time is often worse. Midday hotel curtains do almost nothing against bright outdoor light, and a toddler who can see clearly through the room is not going to settle the way they would in a properly dark space at home. Bright rooms also tend to mean shorter naps, which means a crankier toddler for the rest of the afternoon, which means a harder bedtime, which means a harder next day.

    Light control is one of the fastest and most reliable ways to improve travel sleep. It does not require changing routines or buying elaborate gear. It just requires having the right thing with you.

    What Makes a Blackout Solution Worth Packing

    Not every blackout product justifies the luggage space. Before buying anything, the practical questions are worth asking: will you actually set it up after a long travel day, and will it make a meaningful difference in a room you have never seen before?

    A good travel blackout solution should be compact enough to bring without sacrificing other packing priorities, fast to set up in an unfamiliar room, reusable across multiple trips, and effective enough at blocking light to actually change how your child sleeps. It should also not damage walls or windows. The last thing you want at checkout is a damage charge because of how you attached your blackout solution.

    The options below meet those criteria in different ways depending on your trip type and how much you are willing to carry. Most are window-based solutions that darken the entire room. Our top pick takes a different approach: rather than blacking out the room, it creates a personal blackout zone around your child’s travel crib. That distinction matters, and it is exactly why it earns the top spot.

    Best Overall Blackout Solution

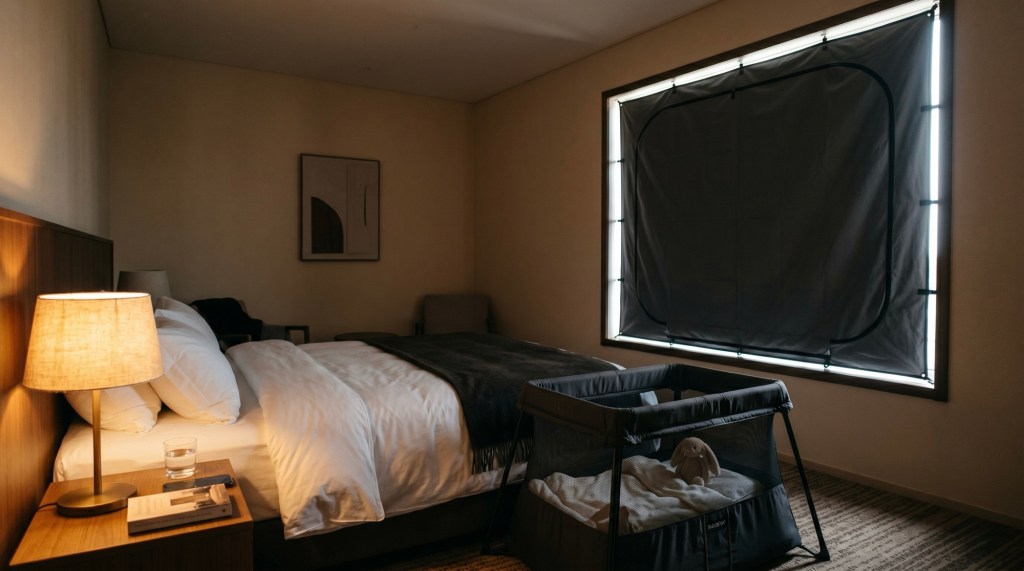
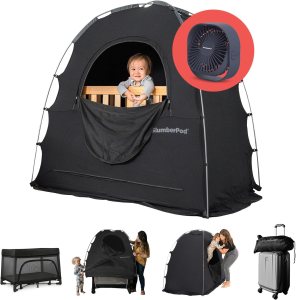
    The best overall portable blackout solution is the one that actually solves the underlying problem, which is getting your child to sleep in an unfamiliar room. Most products on this list do that by darkening the room itself. The Slumberpod takes a different approach. It is a blackout tent that fits around your travel crib or pack-n-play, creating a dark, enclosed sleep space for your child without requiring you to black out the rest of the room.

    That distinction is the whole point. With a Slumberpod, the rest of the hotel room can stay lit. You can read, work, or move around without disturbing nap time or bedtime. For families sharing a single room with a baby or toddler, that flexibility alone is a game changer.

    Honest tradeoff: it is not always the easiest thing to pack, depending on your luggage space. It also takes a little longer to set up than a quick window cover. But it is the best thing ever for making sure your child can rest easily in any room. We have used it on every trip, and while the setup takes a bit more effort, the difference it makes is invaluable. It lets our kid sleep without us having to black out the entire room, which fundamentally changes how a hotel stay actually works with a small child.

    Our Top Pick

    Best Overall: Slumberpod Portable Blackout Sleep Tent

    What We Like

    • Creates total darkness around your child without darkening the whole room
    • Lets parents stay in the room with lights on while baby sleeps
    • Works in any accommodation type, no window adjustments needed
    • Reusable across years of travel as your child grows

    Keep in Mind

    • Bulkier to pack than window-based solutions
    • Setup takes a few minutes longer than other options
    • Requires a travel crib or pack-n-play to fit around

    Check Price on Amazon →

    Best for: Families sharing a hotel room with a baby or toddler in a travel crib, especially when you want to keep using the room normally while your child sleeps.

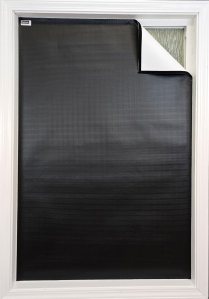
    Best Budget Blackout Option

    If you want to solve the light problem without spending much, a budget blackout option can still make a meaningful difference. The bar is not perfection. It is good enough to get your child down and keep them down longer than they would in an untreated room.

    At the budget end of this category, expect thinner material, less precise fit, and more DIY involvement in getting it to stick or stay. What you should not accept even at a low price point is something that falls off the window in the middle of the night, lets in so much light it does not actually help, or is so annoying to apply that you stop using it after the first night. A budget blackout option still has to pull its weight.

    Budget Pick

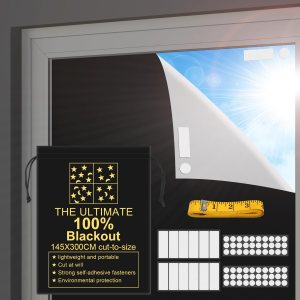
    Best Budget Option: Portable DIY Cut-to-Fit Blackout Sheet

    What We Like

    • Cut to fit any window size you encounter
    • Lower cost makes it easy to justify for occasional trips
    • Lightweight and takes up almost no luggage space
    • Adhesive design avoids leaving residue when removed properly

    Keep in Mind

    • Requires cutting and fitting in each new room
    • Single-use sections may need replacement over time
    • More effort upfront than ready-to-go solutions

    Check Price on Amazon →

    Best for: Occasional travelers who want a simple, affordable fix without committing to a premium product.

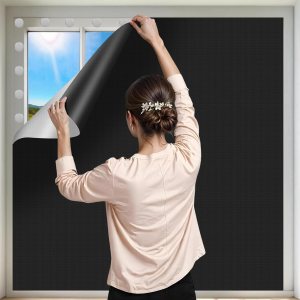
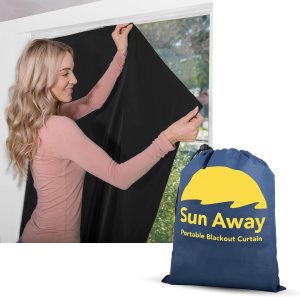
    Best Suction Blackout Shade

    Suction-based blackout shades work well in the right room and are genuinely fast to apply when they do. If your hotel room has large, flat glass surfaces without textured finishes or frames in awkward places, a suction shade can go up in under a minute and come down just as fast at checkout with no residue left behind.

    The limits are worth knowing upfront. Suction does not work well on textured glass, frosted surfaces, or windows that are too warm or too cold to hold a seal. If the suction fails at 3am and light floods back into the room, you have a problem. For families whose trips usually involve standard hotel glass windows, suction shades are one of the cleanest solutions available. For families who stay in a wider variety of accommodation types, having a backup method is worth considering.

    Suction Pick

    Best Suction Blackout Shade: SUN AWAY Portable Blackout Curtain with Suction Cups

    What We Like

    • Very fast setup on smooth glass surfaces
    • No residue or damage risk at checkout
    • Clean look compared with tape-based solutions
    • Folds down compactly for easy packing

    Keep in Mind

    • Does not work on textured, frosted, or very hot or cold glass
    • Suction can fail overnight in some conditions
    • Single panel may not cover oversized windows fully

    Check Price on Amazon →

    Best for: Hotel rooms with large, smooth glass windows and parents who want the fastest possible setup.

    Best Temporary Blackout Curtain or Panel

    For parents who want fuller coverage and are willing to carry slightly more to get it, a temporary blackout curtain or panel is the option that comes closest to the darkness you have at home. These are heavier and bulkier than the other options on this list, but they cover more of the window and tend to block more total light, including the edge gaps that smaller solutions miss entirely.

    This type of solution makes the most sense for longer stays at vacation rentals or grandparents’ houses where you will be setting it up once and leaving it in place for several nights. It is less ideal for a one-night hotel stay where you will be tearing it down at checkout the next morning. Before packing one, honestly assess whether the extra coverage is worth the extra bag space for the specific trip you are taking.

    Full Coverage Pick

    Best Temporary Curtain or Panel: Blackout EZ Total Sunlight Blocking Window Cover

    What We Like

    • Total light blocking, closest to home blackout darkness
    • Customizable to fit different window sizes
    • Covers edge gaps that other solutions miss
    • Worth it for longer stays where setup is done once

    Keep in Mind

    • Bulkier than other options on this list
    • More effort to set up and tear down for short stays
    • Better suited to rentals than one-night hotel stays

    Check Price on Amazon →

    Best for: Families who prioritize full darkness over minimal packing, especially on longer multi-night stays.

    Best Ultra-Packable Light Blocking Solution

    If luggage space is your biggest constraint and you want something that takes up almost no room at all, an ultra-packable light blocking option is worth knowing about. These are typically thin, foldable, and designed to fit into a corner of your bag without displacing anything else.

    The tradeoff is that packability usually means less coverage and less light-blocking power than fuller solutions. But for short trips, overnight stays, or situations where you just need to reduce brightness rather than eliminate it entirely, an ultra-packable option can still meaningfully improve your child’s sleep without adding real weight to the bag.

    Ultra-Packable Pick

    Best Ultra-Packable Option: RUseeN Portable Blackout Shades

    What We Like

    • Smallest footprint of any option on this list
    • Easy to justify packing even for short overnight trips
    • Lightweight enough to forget it is in the bag
    • Reusable across many trips with no setup hassle

    Keep in Mind

    • Less coverage and darkness than fuller solutions
    • Better for reducing brightness than achieving full blackout
    • May not fit oversized hotel windows

    Check Price on Amazon →

    Best for: Parents whose biggest constraint is luggage space and who want the lightest possible solution that still helps.

    Fast Backup Blackout Hacks That Actually Help

    Even with a good blackout product in the bag, hotel rooms sometimes still let in more light than expected. A few quick hacks worth knowing:

    Layer hotel curtains with your portable blackout. Most hotel rooms have both sheer curtains and heavier drapes. Closing both before adding your portable solution gives you an extra layer that can eliminate a significant amount of light before your product even does its job.

    Use binder clips or clothespins to close curtain gaps. The center gap where hotel drapes meet in the middle is one of the worst light offenders. A couple of small clips pulled from your bag can close that gap entirely at zero extra cost and zero setup time.

    Block light from under the door. Light bleeding in from hallways under the door is surprisingly disruptive, especially in rooms where the sleep area is close to the entrance. A rolled-up towel pushed against the bottom of the door takes thirty seconds and works well.

    Know what is not worth improvising. Tape on walls, aluminum foil on windows, and elaborate DIY rigs tend to be more trouble than they are worth on a travel day. Stick to fast interventions and save the engineering for home.

    What We Would Not Pack

    A few types of blackout solutions consistently underdeliver for travel and are not worth the bag space:

    • Large, rigid blackout panels that require their own carrying case and barely fit in a standard hotel closet
    • Anything that requires significant measuring, cutting, or precise fitting to work in a new room
    • Products that only work on one specific window type when hotels vary widely
    • Solutions that leave adhesive residue on glass or walls, creating checkout risk
    • Anything with a setup process so annoying that you will skip it on a tired night and defeat the whole purpose

    The best travel blackout solution is the one you will actually use. If it is too much effort, it will stay in the bag.

    How to Build a Better Hotel Sleep Setup

    Blackout is one piece of the puzzle. A few other things that consistently improve travel sleep when combined with good light control:

    Pair blackout with a white noise machine or app. Hotel hallways, neighboring rooms, and HVAC systems are all noisier than home. A portable white noise machine or a phone app creates a consistent sound layer that masks interruptions and helps your child stay asleep through them.

    Bring familiar comfort items. A familiar blanket, stuffed animal, or sleep sack gives your toddler something recognizable in an unfamiliar room. Combined with darkness and white noise, familiar sensory cues do a lot to make a strange room feel safe enough to sleep in.

    Set up the sleep environment before your child sees the room. If possible, get the room dark and the white noise running before bringing your toddler in. Starting bedtime in an environment that already feels calm makes the transition significantly easier than trying to set everything up while a tired toddler is already melting down.

    Keep the routine as consistent as possible. The room is unfamiliar. The bed may be unfamiliar. But if the bedtime routine is the same, your child has a strong cue that sleep is coming. Consistent routine plus good environment gives you the best realistic chance of a smooth night away from home.

    Final Thoughts

    The best blackout solution is the one you will actually use after a long travel day. You want something portable, simple, and effective enough to improve naps and bedtime without turning room setup into a second job.

    If you are choosing one today, the Slumberpod is our top pick because it solves the problem in the cleanest way: your child gets full darkness, you get to keep using the room normally. The packing tradeoff is real, but the difference it makes on every trip is worth it. If a window-based solution fits your trip style better, the suction shade is the fastest setup and the temporary curtain gives the fullest coverage. If luggage space is genuinely the constraint, the ultra-packable option still beats nothing by a wide margin.

    Frequently Asked Questions

    How do I darken a hotel room for a toddler nap?

    The most reliable approach is combining your portable blackout solution with what the hotel already has. Close both the sheer curtains and the heavier drapes first, then apply your portable blackout over that. Use binder clips to close any center gaps and a rolled towel at the door bottom for hallway light. That layered approach consistently produces better results than any single product alone. If you want to skip the room-darkening entirely, a Slumberpod creates a personal blackout zone around your child without requiring you to treat the windows at all.

    Do portable blackout curtains actually work?

    Yes, with realistic expectations. A good portable blackout solution will meaningfully darken a hotel room compared with hotel curtains alone, but it is unlikely to produce the same complete darkness as a permanent blackout curtain at home. For most babies and toddlers, the goal is not perfection. It is reducing brightness enough that sleep becomes easier. Most portable solutions do that effectively when used correctly.

    What is the easiest blackout solution for travel?

    Easiest in terms of setup time is either a suction shade on smooth glass or a well-designed portable blackout panel that attaches simply. Easiest in terms of packing is an ultra-compact or foldable option that slips into a corner of your bag. Easiest in terms of just working in any room is a sleep tent like the Slumberpod, which sidesteps the window problem entirely. The right answer depends on whether your biggest constraint is setup time, luggage space, or accommodation variety.

    Are suction blackout shades worth it?

    For the right room, yes. If your hotel has large, smooth glass windows, a suction shade is one of the fastest and cleanest solutions available. The caveat is that suction reliability varies with glass texture, temperature, and surface condition. If you travel to a variety of accommodation types, having a backup method in the bag alongside a suction shade is a reasonable precaution. For families who mostly stay in standard hotel rooms, suction shades tend to work consistently well.

    Is the Slumberpod worth it for hotel travel?

    If you travel with a baby or toddler in a travel crib and share a hotel room, yes. The Slumberpod creates total darkness around your child without requiring you to black out the rest of the room, which means you can read, work, or move around while they sleep. The tradeoff is that it takes more luggage space than a window cover and a few minutes longer to set up. For families who travel often with young children, the difference it makes on every trip more than justifies the packing cost.

  • Best Bottle Prep Systems for Middle-of-the-Night Feeds

    Best Bottle Prep Systems for Middle-of-the-Night Feeds

    Affiliate disclosure: This post contains affiliate links. If you buy through these links, we may earn a small commission at no extra cost to you. We only recommend products we believe are worth your money.

    It is 3am. Your baby is crying. You are operating on two hours of broken sleep and you need a bottle ready in the next sixty seconds or everyone is going to have a very bad night. This is not the moment to be measuring formula in the dark, running the tap to get the right temperature, and hoping you did not just scoop one too many scoops.

    The right bottle prep system removes most of that. Whether you want a machine that does everything automatically, a budget-friendly pitcher method that cuts prep down to pouring and warming, or a gentle warmer for stored breast milk, there is a setup that fits your situation. These are the options worth your money and the ones we have actually used.

    Quick Answer: Which Bottle Prep System Should You Get?

    The Short List

    These are the systems most likely to save you time and frustration on the hardest nights. Keep reading for the full breakdown.

    Why Bottle Prep Systems Are Worth It for Night Feeds

    Sleep deprivation is cumulative and it compounds fast. The more steps you have to complete at 3am, the more likely you are to make a mistake, the longer it takes, and the more awake you become in the process. A bottle prep system removes steps. Fewer steps means a faster feed, which means a faster return to sleep for both you and the baby.

    The math is straightforward. If your baby feeds every two to three hours overnight and each manual prep takes four to five minutes including waiting for water to reach the right temperature, that is fifteen to twenty minutes of active effort across a single night. A machine or a pitcher method eliminates most of that. Over the first three months, that time adds up to hours of sleep you either get back or do not.

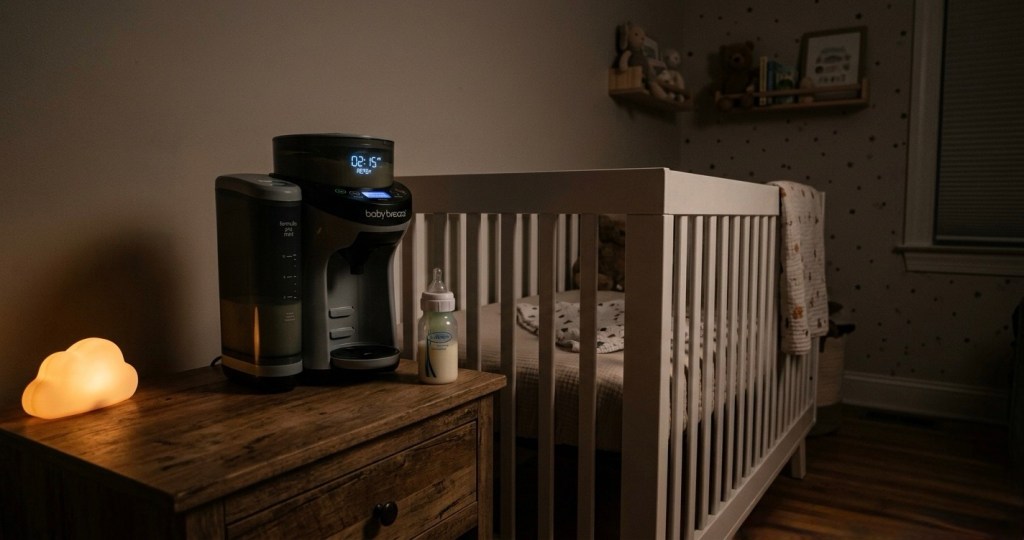
    Best Overall Bottle Prep Machine: Baby Brezza Formula Pro Advanced

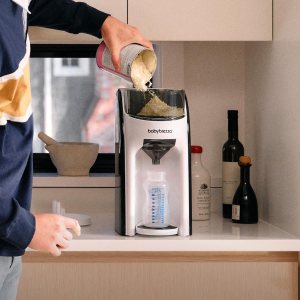
    The Baby Brezza Formula Pro Advanced is the clearest all-in-one pick for formula-feeding families who want to remove as many steps as possible from the night feed process. It automatically mixes, heats, and dispenses formula in one unit, which means at 3am you press a button and a ready bottle comes out. No measuring, no shaking, no waiting for water to cool. Babylist named it their best overall formula maker, and the core value prop holds up in practice: it replaces the kettle, the thermometer, and the manual scoop entirely.

    The machine works by storing dry formula in a built-in powder container and water in a reservoir, dispensing both at the right ratio and temperature automatically. The powder settings are calibrated per formula brand to account for density differences, which matters because not all formulas pack the same way. Setup takes some initial attention to get the settings right for your specific formula, but once it is dialed in, the night feeds become a one-button operation.

    Our Top Pick

    Baby Brezza Formula Pro Advanced

    What We Like

    • Automatically mixes, heats, and dispenses in one step
    • Eliminates measuring, shaking, and temperature guessing at 3am
    • Formula and water settings calibrated per brand for accuracy
    • Named best overall formula maker by Babylist

    Keep in Mind

    • Higher upfront cost than any pitcher or manual method
    • Requires initial setup and calibration for your specific formula
    • Needs regular descaling to maintain performance

    Check Price on Amazon →

    Best for: Formula-feeding families who want the most complete solution and are willing to invest in getting night feeds down to a single button press.

    Best Budget Option: Dr. Brown’s Formula Mixing Pitcher

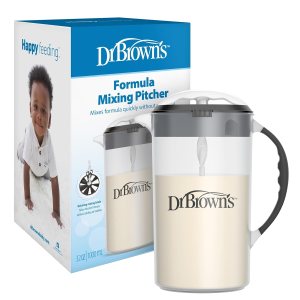
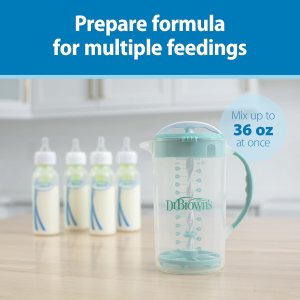
    This is the one we use for both of our kids and would recommend first to most formula-feeding families before suggesting a machine. The Dr. Brown’s Formula Mixing Pitcher lets you batch-mix up to 36 ounces at a time, which covers a full day or more of feeds depending on your baby’s intake. You mix it once, refrigerate it, and then each night feed is just pouring and optionally warming. No scooping in the dark, no counting, no ratio math at 3am.

    Babylist specifically calls it out as a top formula pitcher option, and the design is genuinely well thought out. The pitcher uses a mixing disc that reduces clumping and minimizes air bubbles compared to manual shaking, which matters for babies prone to gas. The cost is dramatically lower than any formula machine, the setup is immediate with no calibration required, and the workflow it creates is one of the most practical improvements you can make to the overnight routine.

    Budget Pick

    Dr. Brown’s Formula Mixing Pitcher

    What We Like

    • Batch mixes up to 36 oz so night feeds are just pour and warm
    • Mixing disc reduces clumping and air bubbles vs manual shaking
    • Dramatically cheaper than any formula machine
    • No setup, calibration, or descaling required
    • Our personal pick for both of our kids

    Keep in Mind

    • Requires daytime prep discipline to keep the pitcher filled
    • You still need to warm the bottle if your baby prefers warm formula

    Check Price on Amazon →

    Best for: Formula-feeding families who want to dramatically simplify night feeds without the cost of a machine. This is the sweet spot for most families.

    Best for Breast Milk Warming: Dr. Brown’s MilkSPA Breast Milk and Bottle Warmer

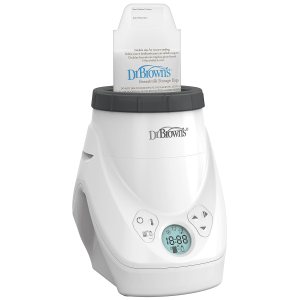
    Breastfeeding parents who pump and store milk have a different problem than formula-feeding parents. The machine does not need to heat water or dispense powder. It needs to warm stored breast milk from refrigerator temperature to feeding temperature gently, consistently, and without overheating it. Overheated breast milk loses nutritional properties, so precision matters more here than speed alone.

    Parents testing published by Parents magazine specifically preferred the Dr. Brown’s MilkSPA for breast milk, and the design reflects why. It uses a gentle water bath warming method rather than dry heat, which distributes temperature evenly and avoids hot spots. It is also compatible with breast milk storage bags, not just bottles, which removes the extra step of transferring milk from a bag to a bottle before warming. An auto-shutoff prevents overheating even if you start it and then get distracted by a crying baby.

    Breast Milk Pick

    Dr. Brown’s MilkSPA Breast Milk and Bottle Warmer

    What We Like

    • Gentle water bath warming protects breast milk nutrients
    • Works with breast milk storage bags as well as bottles
    • Auto-shutoff prevents overheating if you get distracted
    • Preferred by parents in testing published by Parents magazine

    Keep in Mind

    • Gentler heating means it is slower than formula prep machines
    • Not designed for formula preparation

    Check Price on Amazon →

    Best for: Pumping and breastfeeding parents who store milk and need it warmed gently and consistently without the risk of overheating or losing nutritional quality.

    Best No-Machine Manual Shortcut: The Pitcher Method

    For many families, the Dr. Brown’s Formula Mixing Pitcher is not just the budget pick. It is genuinely the best overall workflow. Mix a full day’s worth of formula once during the day when you have the bandwidth to measure carefully, refrigerate it, and at every night feed you are simply pouring a pre-made bottle and warming it if needed. That is the whole process.

    The CDC notes that bottles do not need to be warmed at all. If your baby accepts formula at refrigerator temperature or room temperature, the night feed process becomes pour and feed with no warming step involved. If your baby prefers it warm, add a bottle warmer to the setup and you are still looking at under two minutes per feed with zero measuring in the dark.

    This method also travels well. The pitcher itself does not need to come with you. On trips, you can use the same batch-then-refrigerate approach with a standard pitcher, or simply pre-portion formula into small containers during the day so the nighttime step is still just measuring once rather than every feed.

    Manual Shortcut

    The Pitcher Method: Dr. Brown’s Formula Mixing Pitcher

    What We Like

    • One prep session covers a full day of feeds
    • Night feeds become pour-only with no measuring or mixing
    • Works without warming if your baby accepts room-temp or cold formula
    • No machine, no power required, no counter space needed
    • Travels easily and works anywhere

    Keep in Mind

    • Requires consistent daytime prep to keep the pitcher stocked
    • Pre-mixed formula should be refrigerated and used within 24 hours per CDC guidance

    Check Price on Amazon →

    Best for: Parents who want the simplest possible night feed workflow without buying a machine. If you can build the daytime prep habit, this method is hard to beat.

    Which System Is Right for You

    If you want maximum automation and can justify the cost: Baby Brezza Formula Pro Advanced. Press a button, get a bottle. It is the closest thing to a fully hands-off night feed that currently exists.

    If you want the best value and are willing to build one daily habit: Dr. Brown’s Formula Mixing Pitcher with the pitcher method. This is the setup we used for both of our kids and would recommend first to most formula-feeding families. It costs a fraction of a machine and works just as well in practice for the vast majority of parents.

    If you are pumping and storing breast milk: Dr. Brown’s MilkSPA. Gentle water bath warming, storage bag compatible, auto-shutoff. It is designed for this specific use case in a way that general bottle warmers are not.

    If you want no machine at all: The pitcher method using the Dr. Brown’s pitcher plus a bowl of warm water for warming if needed. The CDC confirms bottles do not need to be warmed, so if your baby is flexible on temperature, the night feed workflow can genuinely be just opening the fridge and pouring.

    What We Would Not Buy

    • Bottle warmers that use dry heat rather than water bath or steam. Dry heat tends to create hot spots that can damage breast milk and create uneven temperature in formula.
    • Machines with complex touchscreen interfaces that are difficult to operate quickly in low light at 3am.
    • Very cheap warmers with no temperature control, where you are still guessing whether the bottle is the right temperature after warming.
    • Systems that only work with one specific proprietary bottle brand, locking you into something that may not fit your baby’s feeding needs.

    Final Thoughts

    At 3am, every second of bottle prep feels longer than it is. The right system does not just save time. It removes the mental effort of measuring, estimating, and waiting from a moment when you have almost nothing left to give.

    Most families do not need a $200 machine to solve this problem. The Dr. Brown’s pitcher method costs under $20, requires one daily habit, and turns every night feed into a pour-and-go operation. If you want the machine anyway, the Baby Brezza is the right one. And if you are warming stored breast milk, the MilkSPA is worth every penny for the gentleness and peace of mind it provides.

    Frequently Asked Questions

    Is the Baby Brezza Formula Pro Advanced worth it?

    For exclusive formula feeders who do multiple night feeds and want the process as close to one-button as possible, yes. It removes every manual step: no measuring, no shaking, no temperature checking. The upfront cost is significant but the time and mental load savings across the newborn stage are real. If budget is a concern, the Dr. Brown’s pitcher method achieves a similar result for a fraction of the price with one daily prep habit.

    Can I pre-mix formula and refrigerate it?

    Yes. The CDC states that prepared formula can be stored in the refrigerator for up to 24 hours. This is the foundation of the pitcher method and one of the most practical changes you can make to your overnight routine. Mix once during the day, refrigerate, pour as needed through the night. You do not need a machine to get the benefit of pre-mixed formula.

    Do bottles need to be warmed?

    No. The CDC is clear that warming is a preference, not a requirement. Some babies accept formula at refrigerator temperature or room temperature without issue. If your baby tolerates cold or room-temperature bottles, the night feed process can be as simple as opening the fridge and pouring. If your baby prefers warm formula, a bottle warmer adds a step but the pitcher method still makes the overall process meaningfully faster than starting from scratch each feed.

    What is the difference between the Baby Brezza and the pitcher method?

    The Baby Brezza automates everything in real time: you press a button and it mixes, heats, and dispenses a fresh bottle. The pitcher method requires one manual prep session per day but then each individual feed is just pouring from a pre-made batch. Both eliminate the hardest part of 3am prep, which is measuring formula in the dark. The machine costs more and removes the daytime prep habit requirement. The pitcher costs almost nothing and requires that habit. For most families, the pitcher method is the better starting point.

  • Best Toddler Airplane Travel Essentials That Actually Make Flying Easier

    Best Toddler Airplane Travel Essentials That Actually Make Flying Easier

    Affiliate disclosure: This post contains affiliate links. If you buy through these links, we may earn a small commission at no extra cost to you. We only recommend products we believe are worth your money.

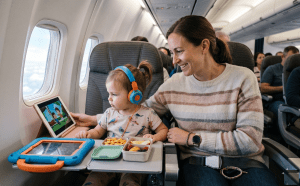
    Flying with a toddler can feel like a tiny endurance event. Between the airport, the waiting, the noise, the seat restrictions, and the very real chance that your child decides this is the exact day they do not want to sit still, even a short flight can feel like a lot.

    The good news is that the right gear can make a real difference. It will not turn a toddler into a frequent flyer, but it can make the trip smoother, easier, and less chaotic for everyone involved.

    These are the toddler airplane travel essentials that are actually worth packing, especially if you want fewer preventable problems and a better chance of landing without feeling completely wiped out.

    Quick Answer: What Is Actually Worth Packing?

    Our Full List at a Glance

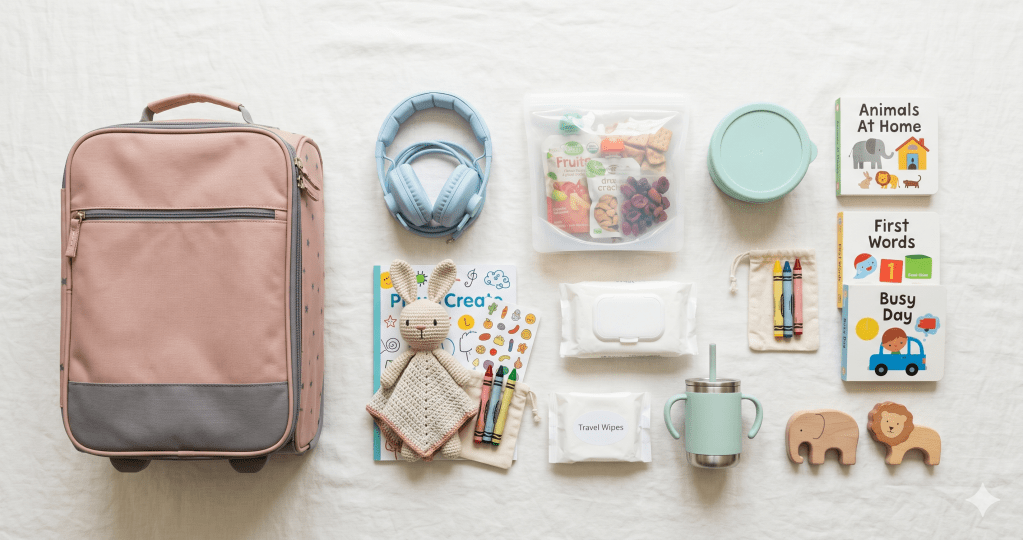
    These are the items that have earned their place in our carry-on every time we fly! Keep reading for why each one matters.

    1. A Quiet Activity That Buys You Time

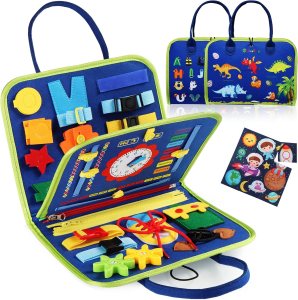
    The best airplane toy for a toddler is the kind that is quiet, compact, easy to hand over quickly, and not made up of twenty tiny pieces. That is why a reusable sticker book, cling activity set, or magnetic activity board is such a strong travel pick.

    It keeps little hands busy without requiring much setup, and it works during long gate waits just as well as after takeoff. What makes it especially useful on a plane is that it creates focus without creating chaos. You are not constantly picking pieces off the floor or hunting for missing parts under the seat.

    Quiet Activity Pick

    Best Travel Activity: Montessori Busy Board

    What We Like

    • Quiet and compact
    • No small pieces to lose or pick up
    • Works at the gate, on the plane, and at baggage claim

    Keep in Mind

    • Novelty wears off eventually
    • Bring a backup activity for longer flights

    Check Price on Amazon →

    Best for: Toddlers who like hands-on activities and get bored quickly once seated.

    2. A Simple Drawing Toy That Does Not Create a Mess

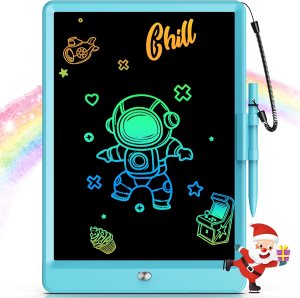
    Crayons and markers sound fine until you are trapped in a small row with limited elbow room. A much easier option is an LCD writing tablet or another mess-free drawing tool.

    This is one of the best airplane essentials for toddlers because it feels interactive without becoming a cleanup problem. Your child can draw, erase, and start over again without dropping caps, staining clothes, or needing your full attention every thirty seconds. It also works at almost every stage of the trip, including the gate, the plane, baggage claim, and the hotel later.

    Mess-Free Pick

    Best Drawing Toy: LCD Writing Tablet

    What We Like

    • Zero mess, no caps or markers to manage
    • Keeps toddlers engaged through repetition
    • Useful across multiple stages of the trip

    Keep in Mind

    • Needs to be charged or have batteries
    • Screen contrast varies by model

    Check Price on Amazon →

    Best for: Toddlers who like doodling, tapping, or repeating the same activity over and over.

    3. A Spill-Proof Snack Setup

    A lot of flight drama is really just hunger, boredom, and lack of control. Snacks help with all three, but only if you can serve them without turning your seat area into a disaster zone.

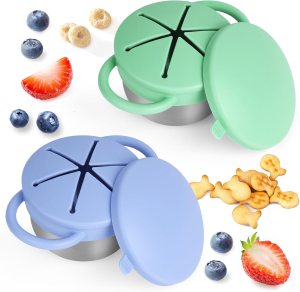
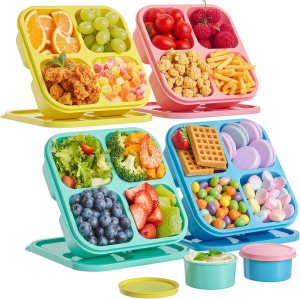
    A spill-proof snack cup gives toddlers independence without letting every cracker hit the floor at once. A divided snack container helps you rotate options and stretch out snack time instead of handing over everything in the first ten minutes. This is one of those areas where practical beats cute every single time.

    Snack Setup Pick

    Best Spill-Proof Snack Cup: 2 Pack Spill Proof Snack Cups for Toddlers

    What We Like

    • Gives toddlers independence with snacks
    • Minimizes cracker explosions and floor messes
    • Easy to refill mid-flight

    Keep in Mind

    • Not fully spill-proof for all snack types
    • Check lid design before buying

    Check Price on Amazon →

    Snack Organization Pick

    Best Divided Snack Container: Bento Box Style Snack Container with Cover

    What We Like

    • Lets you rotate snack options without digging through the bag
    • Stretches snack time across more of the flight
    • Compact and easy to pack

    Keep in Mind

    • Not ideal for wet or sticky snacks
    • Compartment size limits portion flexibility

    Check Price on Amazon →

    Best for: Toddlers who snack often, want to hold their own food, or need frequent resets during travel.

    4. A Water Bottle They Can Actually Manage

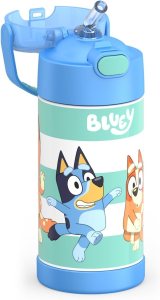
    A regular cup is not worth the hassle on a plane. A leak-resistant toddler water bottle is the better move. You want something easy to open, easy to hold, and unlikely to dump all over your bag when you reach for it in a rush.

    Good hydration plus a familiar drinking routine can help a toddler stay more comfortable during a flight. It is also one less thing you need to actively manage once you are in the air.

    Hydration Pick

    Best Toddler Water Bottle: THERMOS Toddler Cup with Straw

    What We Like

    • Easy for toddlers to hold and operate
    • Leak-resistant design reduces bag disasters
    • Familiar routine helps with comfort mid-flight

    Keep in Mind

    • Must be empty through TSA security
    • Look for a lid that locks to prevent opening in the bag

    Check Price on Amazon →

    Best for: Toddlers who are more settled when they have their own familiar cup or bottle.

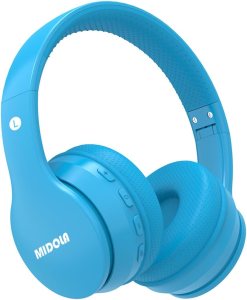
    5. Toddler Headphones for Calmer Screen Time

    Not every family uses screens while traveling, but if you do, make it easier on yourself with a solid pair of toddler headphones. Even if your child only watches something for twenty minutes, that can be the difference between a manageable flight and a rough one.

    Good toddler headphones help create a little bubble of focus, especially when the plane is loud and your child is already overstimulated. Look for a pair that is lightweight, comfortable, and easy to put on without a struggle.

    Screen Time Pick

    Best Toddler Headphones: MIDOLA Kids Bluetooh Headphones

    What We Like

    • Volume-limited to protect hearing
    • Creates focus in a noisy cabin
    • Lightweight and comfortable for small heads

    Keep in Mind

    • Some toddlers resist wearing headphones
    • Fit varies by head size, check sizing before buying

    Check Price on Amazon →

    Best for: Toddlers who watch shows during travel or get overwhelmed by airplane noise.

    6. A Comfort Item for Transitions and Tired Moments

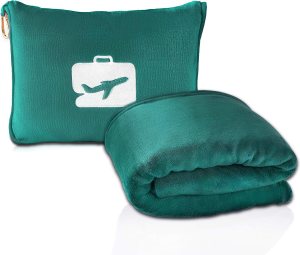
    Toddlers do not just get tired on planes. They get disoriented, overstimulated, and out of routine. That is why a small lovey, toddler blanket, or familiar comfort item can be surprisingly important to pack.

    This is not about packing half the nursery. It is about bringing one familiar thing that helps your child regulate during stressful transitions. Sometimes the best travel essential is not the most impressive one. It is just the one your toddler already trusts.

    Comfort Pick

    Best Toddler Comfort Item: EverSnug Travel Blanket and Pillow

    What We Like

    • Helps toddlers self-regulate during transitions
    • Doubles as a nap blanket on longer flights
    • Takes up minimal space in the carry-on

    Keep in Mind

    • Best results with a familiar item your toddler already loves
    • Bring a backup if the comfort item is irreplaceable

    Check Price on Amazon →

    Best for: Toddlers who struggle with transitions, naps on the go, or unfamiliar environments.

    7. A Compact Wipes and Essentials Pouch You Can Actually Reach Mid-Flight

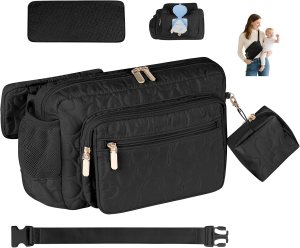
    The moment your toddler needs a wipe on a plane is never a calm, seated moment with your bag conveniently open in front of you. It is usually mid-turbulence, with the seatbelt sign on, while your child is halfway standing on the seat. What you need is something small, accessible in seconds, and wearable hands-free so you are not excavating the overhead bin to find it.

    A great organizer solves exactly this. It is a compact diaper and essentials organizer with a dedicated wipes pocket, a portable changing pad, and five carry configurations that include crossbody and waistpack. On a flight it works best worn across your body during boarding and taxiing so your core travel supplies are on your person, not buried in a carry-on. When you need a wipe, a pacifier, or your phone, it is right there.

    Cleanup Pick

    Best Travel Organizer: Rexmore Quilted Fanny Pack Diaper Bag

    What We Like

    • Five carry configurations including crossbody and waistpack for hands-free access mid-flight
    • Dedicated external wipes pocket you can open one-handed without digging
    • Includes a portable changing pad for airport restroom stops
    • Compact enough to wear under or over a jacket during boarding
    • Water-resistant 290D nylon holds up to spills, rain, and general travel chaos

    Keep in Mind

    • This is a compact organizer, not a full diaper bag — pack it for the flight itself, not the whole trip
    • Best used alongside your main carry-on rather than as a replacement for it

    Check Price on Amazon →

    8. A Carry-On Setup That Keeps You Organized

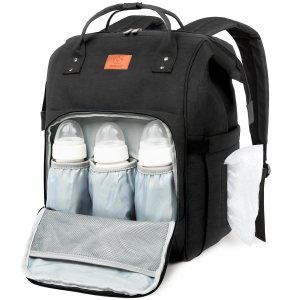
    The easier it is to find what you need, the calmer the whole trip feels. Zip organizer pouches, small packing cubes, or a diaper bag insert can make a real difference when you are handing things over one-handed in a middle seat.

    Group your bag by category: snacks, toys, cleanup, clothes, parent essentials. This helps you respond faster and keeps you from unpacking the entire bag every time your toddler needs something.

    Organization Pick

    Best Carry-On Organizer: KeaBabies Large Diaper Bag Backpack

    What We Like

    • Faster access to what you need mid-flight
    • Reduces bag chaos when things get stressful
    • Reusable across every trip

    Keep in Mind

    • Only works if you actually use the system
    • Pack by category, not by item type

    Check Price on Amazon →

    What We Would Not Overpack

    It is easy to overcompensate before a flight with a toddler. Most parents do it at least once. But more stuff does not automatically make travel easier.

    Skip these:

    • Loud toys
    • Toys with too many small pieces
    • Bulky gear you are bringing “just in case”
    • Multiple backup comfort items
    • Messy art supplies

    The goal is not to pack everything. The goal is to pack the things most likely to solve real problems.

    Final Thoughts

    The best toddler airplane travel essentials are the ones that reduce friction. You want items that help with boredom, hunger, comfort, cleanup, and quick transitions, not a giant bag full of random extras.

    If you are packing for a toddler flight, start with a quiet activity, a solid snack setup, toddler headphones, a comfort item, wipes, and a spare outfit. Those are the essentials most likely to make a real difference when it counts.

    What should I pack in my carry-on for a toddler?

    Start with snacks, one or two quiet activities, wipes, a comfort item, toddler headphones, and a spare outfit. Focus on items that solve the problems that come up most often: boredom, hunger, messes, and tired moments.

    What toys work best on a plane for toddlers?

    Quiet, compact toys work best. Reusable sticker books, LCD writing tablets, and simple hands-on travel activities are safer bets than anything with lots of loose pieces or loud sound effects.

    How many snacks should I bring for a toddler flight?

    More than you think you need, but in a structured way. Smaller portions packed separately in a divided container usually work better than one big snack dump all at once.

    What makes flying with a toddler easier?

    Preparation, realistic expectations, and a bag packed around real pressure points. Boredom, hunger, messes, and transitions are the four things most likely to derail a toddler flight. Pack around those first.